
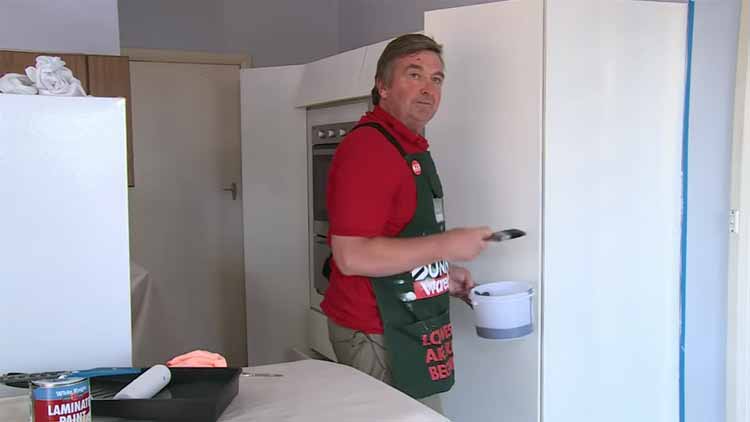
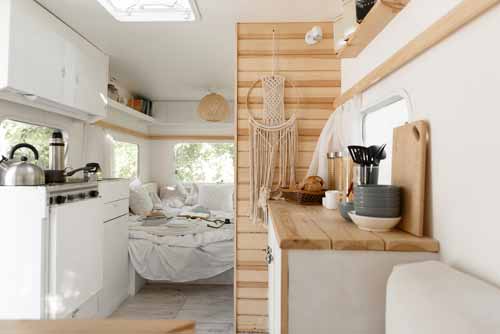
If you’ve ever been in an RV, then you know that the cabinets are usually made of particleboard and they look like they need a new coat. But it doesn’t have to be this way! Painting your cabinets is pretty simple, even if you don’t consider yourself to be handy or artsy. Read on for some tips on how to paint your RV cabinetry without having to hire someone else.
The Supplies Needed To Complete The Project:
First you’ll need to remove everything from the cabinet. Do this carefully so that nothing gets damaged and you don’t misplace any items. You’ll want to lay down some heavy duty trash bags and line them with another one, so that you can take everything out and easily lift the cabinet top off. Following the steps below will help you determine what supplies you’ll need once your cabinet is empty.
1. Roller or paint brush, depending on what method you choose.
2. Paint sprayer (or airless sprayer). If you choose to use a roller and a brush, you will need two different paints.
3. Sandpaper or sanding block, if you are using a brush.
4. TSP or acetone to clean the cabinet surface. If you have greasy cabinets it may help to use an oven degreaser prior to cleaning with either of these items.
5. Acrylic primer for the base coat, and high gloss paint in your cabinet color of choice for the top coat.
6. A sander or sanding block to scuff up any glossy surfaces before painting. Using a power sander like this one can make quick work of it but be careful not to damage anything behind where you are sanding.
7. A brush for applying the primer and a paint roller for the coats of paint.
8. A drop cloth to put down first to catch any spills or splatters. This is not needed if you are using the sprayer or airless sprayer since it will mask off everything, but I recommend it even then just in case.
9. A 4″ or 6″ inch roller for the first coat of paint. This will give you a nice even base layer to work with and allow your paint to go on smoothly. It is best not to use an extension pole since your roller doesn’t need to be that high up off the cabinets, so this little tool makes quick work of it without having to stand on a chair or get up and down a bunch.
10. A paint tray with a lip that clips onto the handle of your roller or paint brush. This makes dipping in and out of the paint easy, since you don’t want to have to put the whole can into a small container like this one. Sneak a peek at this website for more information on about cabinets in an RV.
Steps to Take Paint the Cabinets in an RV:
There are few important steps to take when it comes to preparing the cabinets for painting. Here is what you need to do:
1. Clean the cabinets with a degreaser like TSP or acetone. If you have greasy cabinets, it may help to use an oven cleaner like Easy off BAM prior to using either of these items.
2. Once the grease is all removed and your cabinet has dried completely, you are ready to sand. Use fine grit sandpaper like this one and work your way down until all glossy areas have been sanded. There may be dark stains in the wood that you don’t want showing through so you will need to do more than just scuff up the surface. You can try using steel wool, but I don’t recommend steel wool for cabinets as the fibers can stick up and be harder to paint over.
3. Scuff up any glossy areas left after sanding with a sanding block like this one or by using your power sander if you have one that will do the job well enough.
4. Clean your cabinets again after the sanding with a degreaser or acetone and let it dry overnight once more. If you have used an oven cleaner, then make sure that your cabinets are totally dry before moving on to the next step.
5. Apply a coat of primer, using either a brush or sprayer (or airless sprayer). If you are using a brush, use a roller to apply your top coat.
6. Apply two coats of your color of choice for the top coat using a roller for the first coat and then a brush to get into any nooks and crannies after that has dried.
7. Once your cabinets are entirely dry, add some nice pulls or knobs to make it look finished. This is an important step since you don’t want people banging their knees on the edges of your cabinets when they are walking by. Also, you may consider adding a cabinet for your refrigerator in order to allow more storage space and provide better access to the back wall.
Summary:
Painting cabinets in your RV can be a quick and easy project. The good news is that you don’t need to do anything fancy when it comes to painting the cabinet doors because they are going up against walls which will cover any imperfections or errors with paint. If you’re looking for some affordable, high-quality supplies like brushes, rollers, paint sprayer or airless sprayer, and two types of quality paints for top coat and base coats.