
A broken garage door spring can be a major inconvenience, especially when you’re trying to get in and out of your garage quickly. Fortunately, repair is fairly simple and can be done without having to hire an expensive professional. This step-by-step guide will show you how to repair your own garage door springs in no time or you can hire a professional Scottsdale emergency garage door repair right here.
Choosing the Right Parts:
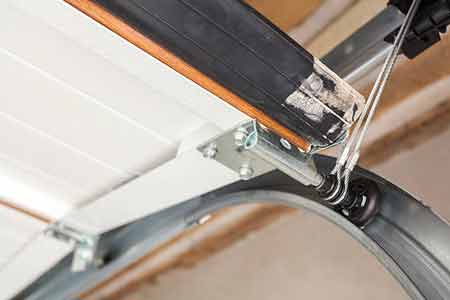
The first step in repairing your garage door springs is to make sure you have the right parts. Your garage door should include two torsion springs located above the top of the garage door—one on each side. You’ll also need an adjustable wrench or socket wrench, a measuring tape, and a ladder for reaching high areas.
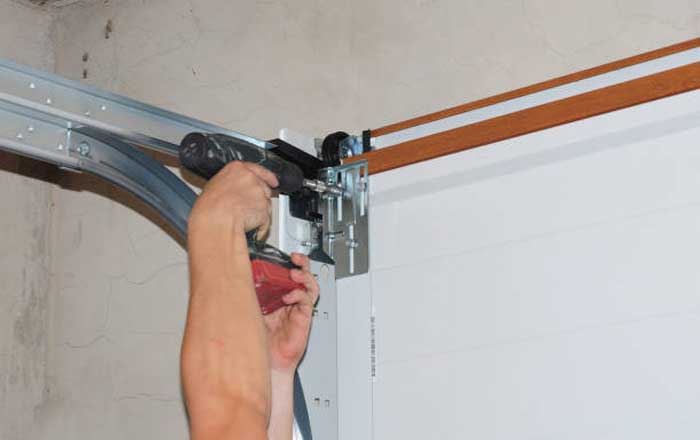
Removing the Old Springs:
Once you’ve found the right parts and materials, it’s time to start removing the old springs. Use your ladder to reach up above your garage door frame and unscrew the eye bolts from both sides using the adjustable wrench or socket wrench. Carefully lower them down so that they don’t fall onto you or anyone else below.
Installing New Springs:
Now it’s time to install the new springs. Measure their length carefully before cutting them to size with wire cutters if necessary. Place one end of each spring into one installation bracket then attach them securely with screws or nuts and bolts as instructed by your particular model of garage door opener. Pull gently on both ends of each spring until they are tightly secured into place on each side of the frame.
Testing Your Work:
Before testing out your newly repaired spring system, make sure that everything is properly tightened up so that there’s no wiggle room between the components. Then, try opening and closing your garage door manually a few times before switching it over to an automatic opener if you have one installed already. If everything seems good here, then go ahead and start using it as normal!
Can I repair my own broken garage door springs?
Yes! With some basic tools and instructions from this guide, you should be able to successfully repair your own broken garage door springs in no time at all!
What parts do I need for this repair?
You’ll need two torsion springs (one on each side), an adjustable wrench or socket wrench, a measuring tape, a ladder for reaching high areas, and wire cutters (if needed).
Is this process dangerous?
It can be if done incorrectly; always use caution when dealing with heavy machinery like this—especially when handling potentially hazardous items such as screws or nuts and bolts! Be sure to consult an expert if you ever feel uncomfortable while performing any part of this process yourself.
Conclusion:
Repairing broken garage doors doesn’t have to be expensive or difficult—with some basic tools and knowledge from this guide, anyone should be able to do it easily in just a few steps without hiring an expensive professional! Take care when working around potentially hazardous items such as screws or nuts and bolts during installation; otherwise follow these directions closely for successful repairs every time.